Refractory is an integral part of boilers. In the steam-generating industry, refractory materials are used to fill gaps and openings (to help keep the fire inside the firebox), to line wet and dry hoppers for collecting ash and slag, and to protect the lower furnace wall tubes inside fluidized-bed and cyclone-fired boilers and boilers fired by refuse-derived fuels.
Refractory failure is a major cause of boiler energy losses as well as a major contributor to boiler outages. Understanding why a refractory material fails requires a complex analysis of many interrelated factors: materials that don’t match the operating environment, incompatibility with the by-products of fuel combustion, and improper installation techniques (Figures 1 and 2).
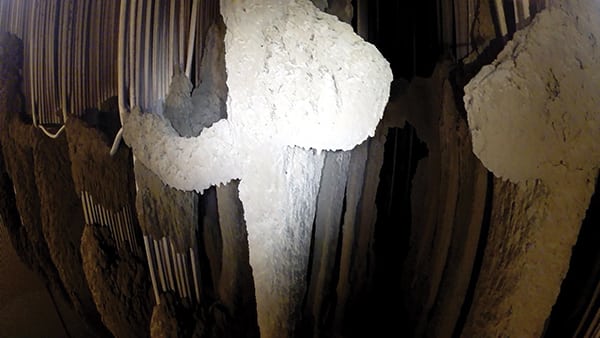
Courtesy: BRIL Inc.
1. Ash me no questions. Flyash inside a penthouse between the screen, superheater, and reheater.
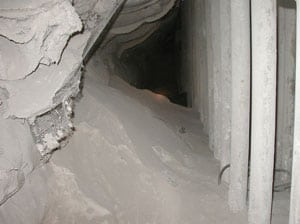
Courtesy: BRIL Inc.
2. Unprotected section. A wet bottom-ash hopper with areas of missing refractory.
Diagnosing a refractory failure can be described as a series of steps leading to discovery of the root cause.
Step 1: Begin the discovery process
The process begins with the collection of basic technical information about the failure, followed by interviews of plant and installation personnel. Document the following:
- Material samples and data sheets of the existing brick or refractory lining.
- Material samples of ash clinkers and slag.
- Chemical analysis of the fuel being burned.
- Where and for how long the refractory material was stored prior to installation.
- When it was manufactured.
- Its condition at the time of installation.
- How much material was installed.
- How it was installed or applied (pneumatically, toweled, poured, shotcrete, etc.).
- How it was cured and/or dried, using which procedures.
Step 2: Examine and test the existing material
The existing material (or lack thereof) should be examined for signs that may indicate the root cause of the failure. When looking at an existing refractory lining or photos of it, keep in mind the following questions:
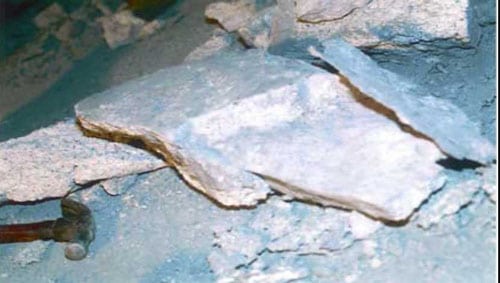
- Did the material fail due to thermal shock, indicated by the shearing away of large sections of the top surface area (Figure 3)?

Courtesy: BRIL Inc.
3. Missing in action. Studs worn away due to a failed furnace wall refractory.
- Is there any evidence (excessive shrinkage, glazing, etc.) that the material had been exposed to excessive temperatures?
- Is there any evidence of mechanical abuse, such as broken or jagged edges or holes (Figure 4)?
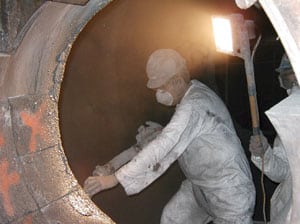
Courtesy: BRIL Inc.
4. Shooting straight. Correct gun application of refractory is essential to its longevity.
- Might the material have failed due to the operation of the furnace or boiler?
- Was the refractory material installed improperly, which would be indicated by a porous or popcorn-like texture?
Samples of the existing refractory material should be collected and sent out for a cold crush test, to verify its strength. The results can then be compared to the manufacturer’s material data sheets. If the strength is not up to snuff, it is probable that the mix was too wet when installed.
Samples of any recovered slag and ash clinkers should be collected and sent out as well, but for a chemical analysis. Samples of slag also should be subjected to a pyrometric cone equivalent test, which will indicate the minimum temperature to which the refractory may have been exposed.
Step 3: Calculate the base-to-acid ratio
The next step in the process is to document the environment that the refractory material was exposed to. One way to do this is by calculating the material’s base-to-acid ratio (b/a) using the information produced by the chemical analysis of Step 2. The b/a value will give a starting point as to what type of refractory material should have been chosen.
- A b/a ratio less than or equal to 0.25 indicates an acid condition, suggesting that a SiO2-type refractory should have been considered.
- A b/a ratio greater than 0.25 but less than 0.75 indicates a neutral condition, suggesting that an Al2O3, SiC, or chrome-type refractory material should have been installed.
- A b/a ratio greater than or equal to 0.75 indicates a base condition, suggesting that an MgO or dolomite-type refractory material would have been a wiser choice.
Step 4: Review the boiler’s recent history
Now it’s time to combine all the information gleaned from the previous steps. All of the boiler’s service conditions should be thoroughly reviewed and analyzed to determine how they might have affected the failed refractory material. Pay particular attention to the fuel or raw materials being burned, the start-up fuel used, records of ash and slag content and gas temperatures, and any instances of unusual plant operating procedures.
Among the technical factors that could have contributed to a refractory failure are the following:
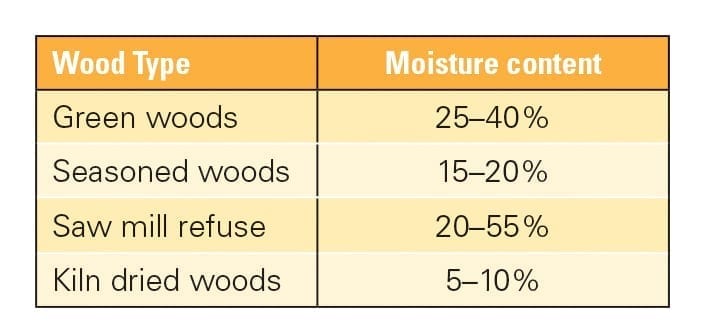
- The combination of a high (>15%) moisture content in a fuel and a reducing atmosphere can cause a separation of silicon carbide base materials (grain).
- Certain fuel constituents (iron oxide, potassium, or sulfur) found in fuel, slag, or ash could react with cements (calcium-aluminate) present in cement-bonded refractory—especially in the presence of a reducing atmosphere.
- Start-up fuels such as No. 6 oil may contain vanadium, which has been known to react.
Step 5: Review the installation procedures
The focus of the final step of the process is how the refractory was installed. The following paragraphs detail the most common reasons for refractory material lacking proper strength, making it more likely to fail.
Refractory materials have a fairly short shelf life between their manufacture and installation. One year is the recommended limit for cement-bonded materials used for conventional seals inside boilers. Three months or less is the limit for materials used in high-temperature and high-abrasion areas, such as those inside fluidized-bed or cyclone-fired boilers or inside wet bottom-ash hoppers. Refractory material should always be stored in a dry, well-ventilated space.
Many common industrial compounds can easily contaminate a refractory mix and seriously weaken it. Certain salts reacting with the refractory cement will make the material almost useless. For this reason, most refractory manufacturers recommend using potable water for mixing.
Using the right type of mixer, following proper mixing procedures, and knowing the material’s "pot life" (how long it remains viable after mixing) are essential. Using the wrong mixer or pneumatic gun, or even interrupting the operation of the gun for longer than the pot life could compromise the strength of refractory material. In the latter case, material left in the mixer and hoses should be discarded and not re-used. Furthermore, many pneumatically applied refractory materials require pre-wetting prior to their mixing and installation. If the installation contractor used a continuous-feed mixer (in which dry material is added to a hopper, followed by water from a nozzle), pre-wetting would have been impossible.
Hot or cold weather on mixing day also could adversely affect refractory strength. Most refractory manufacturers recommend that the final mix temperature be within a specific range, typically 40F to 90F. Obviously, it likewise is very important to protect the installed refractory from freezing for a minimum of 48 hours or until it is thoroughly dry.
Taking the cure
Only after the refractory material has been cured and then dried will it be at its proper strength. Almost all refractory materials (except those that are phosphate-bonded) require both steps. Failure to properly cure cement-bonded refractory material is the primary cause of its failure and lack of longevity. During this critical period, it is recommended that the surface of the refractory be kept moist (either by a curing compound, wet canvas bags, or water sprays) and the surrounding atmosphere kept humid for at least 24 hours.
After the refractory is cured, it is dried out or baked out to remove all water left in the installed material, allowing it to reach its maximum strength. Unlike curing, the performance of this step is not time-sensitive—unless the refractory material is phosphate-bonded. Such materials must be cured and dried at the same time—and within two to three weeks of installation—because the phosphate will immediately begin to absorb moisture from the atmosphere. Eventually, over a period of two or three weeks the material will begin to slump and fall off.